Water damage from a leaking chimney can transform your cozy fireplace into an expensive nightmare. If you’ve noticed mysterious water stains near your fireplace or damp spots on your ceiling after a rainstorm, your chimney flashing might be the culprit.
Chimney flashing serves as the waterproof barrier between your chimney and roof, preventing water from entering your home at this vulnerable junction. This thin metal or rubber seal works around the clock to redirect rainwater away from the gap where your chimney meets your roofline. When it functions properly, you’ll never think about it.
Understanding what flashing does and recognizing the early warning signs of failure can save you thousands in water damage repairs. From installation problems to weather-related wear, several factors can compromise this critical component of your chimney system.
What Is Chimney Flashing?
Chimney flashing is a waterproof barrier that seals the joint where your chimney meets the roof. It directs water away from this vulnerable connection point to prevent leaks and structural damage.
Purpose and Function
Chimney flashing serves as your home’s primary defense against water infiltration at the roof-chimney junction. This waterproof material creates a sealed barrier that prevents rainwater, melting snow, and ice from entering your home through the gap between these two structures.
The flashing system works by channeling water away from the chimney base and directing it down the roof slope. Without proper flashing, water can seep into your attic, interior walls, and ceilings.
Key functions include:
- Sealing gaps between roof and chimney
- Directing water flow away from vulnerable joints
- Preventing moisture damage to interior spaces
- Protecting structural elements from water infiltration
Failed chimney flashing ranks as the leading cause of home leaks. This makes it more problematic than other common roof issues like damaged shingles or structural cracks.
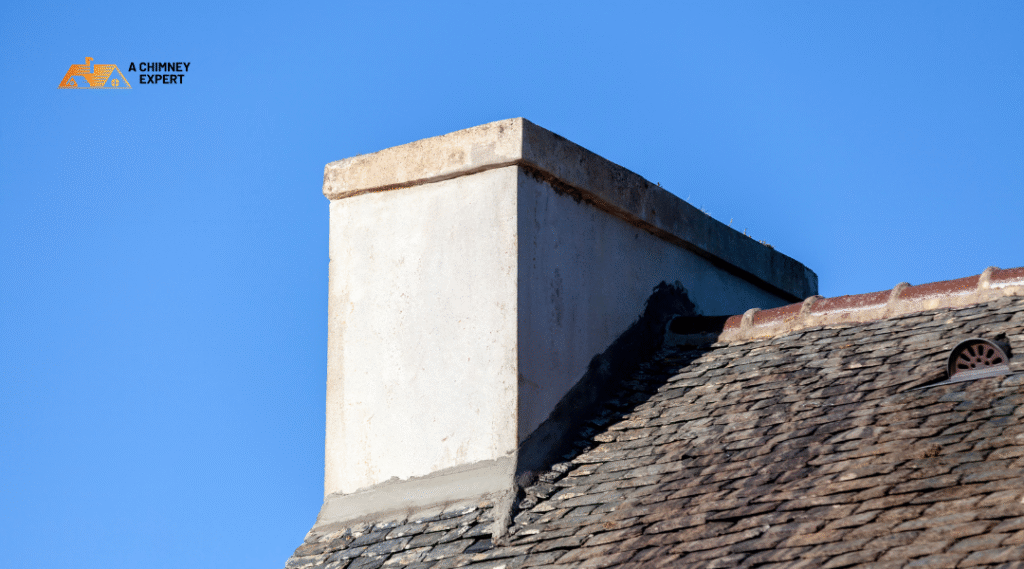
Location on the Roof
Chimney flashing is installed at the base of your chimney where it intersects with the roofline. The installation covers all four sides of the chimney to create a complete water barrier around the entire perimeter.
Flashing placement involves:
- Base flashing: Lies flat against the roof surface
- Step flashing: Follows the roof slope along the sides
- Counter flashing: Embeds into chimney mortar joints
- Back pan flashing: Covers the uphill side of the chimney
The flashing extends several inches up the chimney sides and underneath the surrounding roof materials. This overlapping design ensures water cannot find entry points even during heavy rainfall or snow melt.
You’ll typically see the visible portions as metal strips running along the chimney base. The materials commonly used include aluminum, galvanized steel, copper, or lead-coated metals.
How Chimney Flashing Protects Your Home
Chimney flashing creates a waterproof seal at the critical junction where your chimney meets the roof. This barrier prevents water infiltration and extends the structural lifespan of both components.
Barrier Against Leaks
Your chimney flashing acts as the primary defense against water penetration at the roof-chimney intersection. Water naturally flows down your roof and collects around the chimney base, making this area particularly vulnerable to leaks.
The flashing system redirects water away from vulnerable joints and channels it into your gutters. Step flashing works in overlapping layers along the chimney sides, while counter flashing provides additional protection above it. Base flashing forms the foundation layer at the chimney bottom.
Without this barrier, water seeps into your attic, walls, and ceilings. This moisture creates immediate problems like:
- Water stains on walls and ceilings
- Insulation damage reducing energy efficiency
- Wood rot in roof decking and framing
- Mold growth in damp areas
The flashing prevents these issues by maintaining a watertight seal even as your roof and chimney expand and contract at different rates.
Extending Roof and Chimney Lifespan
Proper flashing significantly extends the operational life of both your roof and chimney structures. Water damage accelerates deterioration of roofing materials, wooden supports, and masonry components.
Your roof decking and support beams remain structurally sound when protected from moisture infiltration. The chimney masonry also benefits from reduced water exposure, preventing freeze-thaw cycles that cause brick and mortar deterioration.
Regular flashing maintenance costs far less than major structural repairs. Preventive care involves annual inspections and prompt repairs of damaged sections. Quality materials like copper or aluminum flashing can last 20-30 years with proper installation.
Failed flashing leads to expensive consequences including roof replacement, chimney rebuilding, and interior damage repairs. These costs often exceed thousands of dollars compared to routine flashing maintenance.
Common Types of Chimney Flashing
Different types of chimney flashing work together to create a complete water barrier around your chimney. Step flashing handles water flow along sloped surfaces, counter flashing provides secondary protection over step flashing, and base flashing seals horizontal joints where your chimney meets the roof.
Step Flashing
Step flashing consists of individual L-shaped metal pieces installed along the sides of your chimney where it meets the sloped roof. Each piece overlaps the one below it, creating a stepped pattern that directs water down the roof.
You’ll find step flashing made from aluminum, copper, or galvanized steel. The flashing pieces measure typically 8 inches by 10 inches, with one leg tucked under your roofing material and the other extending up the chimney wall.
Installation requires precise placement: Each step flashing piece aligns with a course of shingles. Roofers secure the flashing with roofing nails driven through the horizontal leg into the roof deck.
The overlapping design prevents water from penetrating between pieces. Water hits the upper flashing and flows onto the lower piece, then continues down to your gutters.
Step flashing fails when pieces separate, develop holes, or lose their seal with roofing cement. Regular inspection helps you catch problems before leaks develop.
Counter Flashing
Counter flashing provides a second layer of protection over your step flashing. This flashing embeds into mortar joints of your chimney’s masonry or attaches to the chimney surface with mechanical fasteners.
The counter flashing extends down over the step flashing without touching it directly. This creates a two-part system where water cannot penetrate even if one layer fails.
Counter flashing installation methods include:
- Cutting into mortar joints and securing with new mortar
- Using masonry screws with sealant
- Applying with construction adhesive and mechanical fasteners
Your counter flashing should overlap step flashing by at least 2 inches. The bottom edge must allow water to drain freely without creating a dam.
Copper counter flashing lasts longest but costs more than aluminum options. Galvanized steel provides a middle ground for durability and cost.
Problems occur when counter flashing pulls away from the chimney or develops gaps at connection points. Roofing cement can provide temporary repairs, but proper reinstallation ensures long-term protection.
Base Flashing
Base flashing seals the joint where your chimney meets the roof on the uphill side. This flashing handles the most water volume since it catches runoff from the entire roof surface above your chimney.
The base flashing extends under your shingles and up the chimney face. It typically measures wider than other flashing types to handle increased water flow.
Critical installation details:
- Base flashing must extend at least 6 inches up the chimney
- The uphill edge goes under multiple courses of shingles
- Roofing cement seals all edges and nail penetrations
Base flashing often includes a cricket or saddle design for chimneys wider than 30 inches. This raised section diverts water around the chimney instead of allowing it to pool.
You’ll see base flashing problems first because it handles the most stress. Ice dams, debris accumulation, and thermal expansion cause the most failures in this area.
Professional installation ensures proper integration with your roofing system. DIY repairs with roofing cement provide temporary fixes but may not address underlying installation issues.
Why Chimney Flashing Fails
Chimney flashing fails due to three primary factors: weather-related expansion and contraction cycles, improper installation techniques, and gradual deterioration from age and lack of maintenance. Understanding these causes helps you identify problems before they lead to costly water damage.
Weather and Seasonal Expansion
Temperature fluctuations cause your chimney flashing to expand and contract repeatedly throughout the year. This constant movement creates stress points where the metal meets the roof and chimney surfaces.
Freeze-thaw cycles present the greatest threat to flashing integrity. Water enters small gaps, freezes overnight, and expands by approximately 9%. This expansion widens existing cracks and creates new ones.
Heavy rainfall tests your flashing’s waterproofing ability. Storm-driven water can penetrate worn sealant joints and overwhelmed drainage channels around the chimney base.
Wind damage lifts flashing edges and loosens fasteners. Once lifted, flashing loses its ability to shed water effectively and allows moisture underneath the protective barrier.
Snow accumulation adds weight and traps moisture against flashing seams for extended periods. The prolonged contact accelerates corrosion and sealant deterioration.
Poor Installation or Materials
Improperly installed flashing lacks the step-flashing design needed to follow your roof’s slope effectively. Without proper layering, water can flow backward under the flashing material.
Common installation mistakes include:
- Using too few fasteners or placing them incorrectly
- Failing to embed counter flashing into mortar joints
- Skipping essential sealant applications at critical joints
- Reusing old flashing during roof replacement projects
Low-quality materials corrode faster than premium options. Basic galvanized steel may last 15-20 years, while copper flashing can perform for 50+ years with proper installation.
Inadequate overlap between flashing pieces creates vulnerable gaps. Each section should overlap the next by at least 2 inches to maintain water-tight protection.
Age and Neglect
Metal flashing naturally corrodes over time, especially when exposed to acidic rain and atmospheric pollutants. Rust weakens the material and creates holes that allow water penetration.
Sealant deterioration occurs predictably every 5-10 years depending on the product quality and weather exposure. Cracked or missing sealant leaves gaps where water can enter your home.
House settling shifts the chimney position slightly relative to the roof structure. This movement can crack previously tight seals and separate flashing from its mounting points.
Debris accumulation around the chimney base blocks proper drainage and traps moisture against flashing materials. Leaves, twigs, and granules create dams that force water to find alternative paths into your home.
Regular maintenance prevents minor issues from becoming major chimney flashing problems that require complete replacement.
Warning Signs of Failing Flashing
Failed chimney flashing creates visible damage patterns throughout your home, from water stains on ceilings to rust formation on metal components. These warning signs often appear gradually and may initially seem minor, but they indicate serious problems that require immediate attention.
Water Stains or Ceiling Damage
Water stains near your chimney represent the most common sign of flashing failure. You’ll notice brown or yellow discoloration on ceilings and walls adjacent to the chimney structure.
These stains typically appear first in the attic space before spreading to living areas below. The discoloration may seem dry during periods without rain but becomes darker and more pronounced after storms.
Active water damage signs include:
- Wet spots or dripping water during or after rainfall
- Peeling paint or wallpaper near the chimney
- Warped or bubbling drywall surfaces
- Musty odors indicating mold growth
Water infiltration through failed flashing can damage insulation, wooden framing, and electrical components in your walls. The moisture creates ideal conditions for mold and mildew development, which poses health risks and requires professional remediation.
Interior water damage often extends beyond the immediate chimney area. Water follows gravity and structural elements, potentially affecting rooms on lower floors or spreading horizontally through ceiling joists.
Rust, Gaps, or Loose Flashing
Visible deterioration of the flashing material itself provides clear evidence of impending failure. Metal flashing develops rust spots, corrosion patches, or complete holes that compromise its water-blocking ability.
Physical flashing problems include:
- Rust stains or orange discoloration on metal surfaces
- Gaps between flashing and chimney or roof materials
- Loose or separated flashing sections
- Cracked or missing caulk seals
Galvanized steel flashing typically shows rust first at cut edges and fastener points. Aluminum flashing may develop corrosion or pull away from attachment points during thermal expansion cycles.
You can inspect flashing condition from ground level using binoculars or by safely accessing your roof. Look for sections that appear lifted, bent, or separated from the chimney or roofing materials.
Missing or deteriorated caulk around flashing joints creates immediate entry points for water. These gaps often start small but expand rapidly during freeze-thaw cycles.
Drafts and Higher Energy Bills
Failed flashing creates air leaks that allow conditioned air to escape from your home. You may notice cold drafts near the chimney during winter months or feel warm air movement during summer cooling periods.
These air leaks force your heating and cooling systems to work harder to maintain comfortable temperatures. Your energy bills may increase noticeably, particularly during extreme weather conditions.
Energy efficiency indicators include:
- Unexplained increases in monthly utility costs
- Difficulty maintaining consistent indoor temperatures
- Cold spots or drafts near the chimney area
- HVAC systems running more frequently
The gaps created by failing flashing break your home’s thermal envelope. This allows outside air to enter and conditioned air to escape, creating energy waste that compounds over time.
Air leaks through compromised flashing also allow moisture-laden air to enter wall cavities. This moisture can cause condensation problems that lead to additional water damage beyond direct rain infiltration.
Risks of Ignoring Damaged Flashing
Failed chimney flashing creates a cascade of problems that extend far beyond simple water stains. Water infiltration damages roof structures, deteriorates masonry, and creates hazardous indoor conditions that threaten your home’s integrity and your family’s health.
Structural Roof Damage
Water penetration through damaged flashing attacks your roof’s structural components systematically. The wooden roof decking absorbs moisture and begins to warp, sag, or develop soft spots that compromise the entire roofing system.
Rafters and support beams suffer from prolonged water exposure. Wood rot weakens these critical structural elements, reducing their load-bearing capacity and creating safety hazards during heavy snow loads or storms.
Common structural damage includes:
- Delaminated plywood or OSB decking
- Cracked or split roof trusses
- Compromised insulation that loses R-value
- Damaged underlayment that allows further water penetration
Replacing structural roof components costs significantly more than timely flashing repairs. A single section of rotted decking requires removing roofing materials, replacing the damaged wood, and reinstalling everything above it.
The damage spreads outward from the initial leak point. What starts as a small flashing gap becomes a major structural repair project affecting multiple roof sections and requiring professional intervention.
Chimney Brick and Mortar Issues
Water infiltration behind failed flashing causes severe masonry deterioration that compromises your chimney’s structural integrity. Mortar joints absorb moisture during wet periods and expand during freezing temperatures, creating cracks and gaps.
Freeze-thaw cycles accelerate this damage process. Water trapped in mortar joints expands when frozen, forcing the joints apart and creating larger openings for additional water penetration.
Masonry problems from water damage:
- Spalling bricks that crack and break apart
- Deteriorated mortar joints requiring repointing
- Efflorescence (white staining) from mineral deposits
- Chimney crown cracks that worsen over time
The chimney’s structural stability becomes compromised when water repeatedly penetrates the masonry. Loose bricks pose falling hazards, and weakened mortar joints can cause entire sections to shift or collapse.
Masonry repairs require specialized skills and materials. Professional masons must remove damaged mortar, replace broken bricks, and rebuild sections while maintaining proper structural support and weather resistance.
Mold, Rot, and Indoor Damage
Water from damaged flashing creates ideal conditions for mold growth in hidden spaces like wall cavities and attic areas. Mold colonies develop within 24-48 hours of water exposure and spread rapidly through organic materials.
Health risks from mold exposure:
- Respiratory irritation and allergic reactions
- Asthma complications in sensitive individuals
- Persistent musty odors throughout the home
- Property devaluation from contamination issues
Wood rot affects structural framing members, drywall, and insulation materials. Wet wood develops fungal infections that weaken its cellular structure and create soft, spongy areas that cannot support normal loads.
Interior damage becomes visible through water stains on ceilings and walls. Paint peels, wallpaper bubbles, and flooring near the chimney may warp or buckle from moisture infiltration.
Remediation costs escalate quickly when mold spreads or rot affects multiple structural elements. Professional mold removal requires containment procedures, specialized equipment, and replacement of contaminated materials that standard repairs cannot address.
The damage often extends beyond the immediate leak area as water travels along structural members before becoming visible inside your home.
Repairing vs. Replacing Flashing
Minor flashing damage can often be fixed with simple repairs, while severe deterioration requires complete replacement. The extent of damage and the flashing’s overall condition determine the best approach.
When Repairs Are Enough
Small holes, minor gaps, and minor corrosion can typically be addressed through repairs rather than full replacement. Masonry caulk provides effective short-term sealing for tiny gaps or holes in otherwise sound flashing.
Surface rust that hasn’t penetrated through the metal can be treated with rust removal and protective coatings. Minor lifting or loose sections can be re-secured with proper fastening and sealants.
You should consider repairs when:
- Damage covers less than 30% of the flashing
- Metal remains structurally sound
- No holes penetrate completely through the material
- Surrounding roof materials remain in good condition
Keep in mind that repairs serve as temporary solutions. They buy you time before eventual replacement becomes necessary, typically extending the flashing’s life by 2-3 years.
When Full Replacement Is Needed
Complete replacement becomes necessary when flashing shows extensive rust, corrosion, cracking, or structural damage. Holes that penetrate through the metal cannot be permanently fixed with caulk alone.
Replacement is required when flashing becomes:
- Severely corroded or rusted through
- Cracked or broken in multiple locations
- Warped or no longer maintains proper shape
- Missing sections entirely
The replacement process involves removing surrounding shingles and installing new flashing with proper overlap and sealing. Professional installation ensures warranty compliance and prevents future water infiltration.
Replacement costs more initially but provides long-term protection for 15-20 years. This approach prevents recurring repair expenses and protects your home from water damage that could cost thousands in repairs.
Professional Help in Oak Grove, VA
Oak Grove homeowners facing chimney flashing issues benefit from local expertise and specialized knowledge of regional weather patterns. Professional services combine technical skills with understanding of Virginia’s unique climate challenges.
Why Hire A Chimney Expert LLC
A Chimney Expert LLC serves Oak Grove with specialized training in flashing repair and installation. Their CSIA-certified technicians handle custom flashing work that requires precise measurement and proper integration with existing roof systems.
You get professional results when trained specialists assess your specific flashing problems. These experts understand the complex relationship between chimney structure, roofing materials, and water management systems.
Key advantages include:
- Proper installation techniques that prevent future failures
- Access to commercial-grade materials designed for Virginia weather
- Warranty protection on completed work
- Safety protocols for roof work
Their experience with Oak Grove properties means they recognize common flashing failure patterns in local homes. This knowledge helps them identify underlying issues that could affect long-term performance.
Local Knowledge of Virginia’s Climate
Virginia’s weather patterns create specific challenges for chimney flashing systems. Oak Grove experiences temperature fluctuations, seasonal storms, and humidity levels that affect metal flashing performance over time.
Local professionals understand how freeze-thaw cycles impact flashing joints. They know which materials perform best in Virginia’s climate conditions and can recommend solutions that withstand regional weather patterns.
Climate factors affecting flashing:
- Winter ice formation around chimney bases
- Spring rain patterns that test waterproof seals
- Summer heat expansion of metal components
- Fall debris accumulation in flashing channels
This regional expertise helps ensure your flashing repair addresses climate-specific vulnerabilities. Local contractors stock materials proven to perform well in Virginia conditions.
Inspection, Repair, and Maintenance Services
Professional chimney inspection includes thorough flashing assessment as part of comprehensive system evaluation. Experts examine both visible flashing components and underlying structural connections during roof inspection procedures.
A roofing professional trained in chimney systems can identify problems before they cause interior damage. They check flashing integrity, sealant condition, and proper integration with surrounding shingles.
Service offerings typically include:
- Annual flashing condition assessments
- Emergency leak repair services
- Complete flashing system replacement
- Preventive maintenance programs
Regular professional maintenance extends flashing lifespan and prevents costly water damage repairs. Scheduled inspections catch minor issues before they require major reconstruction work.